DJ Booth Checklist: What to Check Before You Start Your Set
Last updated: October 1, 2026
Before you start, check how the previous DJ has left the booth configured. This checklist covers the CDJ and mixer settings that can catch you out during your first mix, with quick checks for the changeover.
You arrive at the club, plug in your USB and have just a few minutes before you start playing.
Even if you know the equipment inside out, there is one thing you should always do before starting: check how the previous DJ has left the booth configured.
Many problems at the start of a set have nothing to do with a fault. The setup is simply different from what you normally use: a channel assigned to the crossfader, Auto Cue switched off, Mono Split in the headphones, an active Sound Color FX or a different tempo range.
At Sounds Market, we have put together this checklist of the main things we would check in a standard booth with CDJs and a mixer before starting a set.
CDJ checklist
1. Check that your USB reads correctly
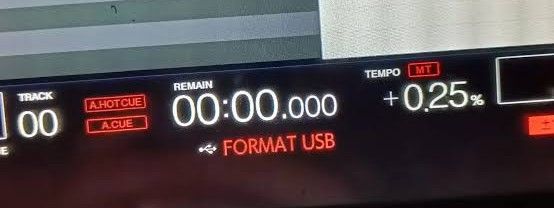
Start here.
Plug in your USB stick and check that the player recognises it, that you can browse your playlists and that tracks load correctly.
Do not wait until the previous DJ finishes to discover a problem with your USB.
If several players in the booth are connected via Pro DJ Link, also check that you can access the USB's contents from the other CDJs.
2. Check that the CDJs are linked
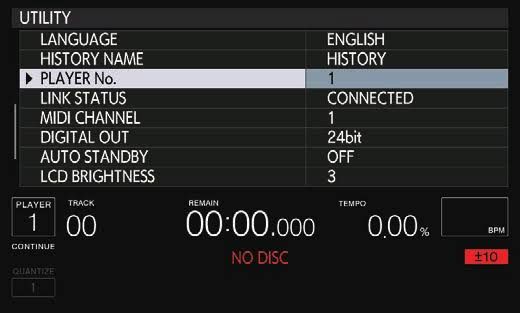
If you use a single USB across several players, make sure the CDJs can see each other via LINK.
If they cannot, one thing to check is PLAYER No. in Utility.
Each player must have its player number correctly assigned. You can normally leave this on automatic so the players handle the assignment themselves and avoid conflicts.
In a regularly used booth, this should already be configured, but it is worth knowing where to look if LINK is not working when you arrive.
3. Check Auto Cue
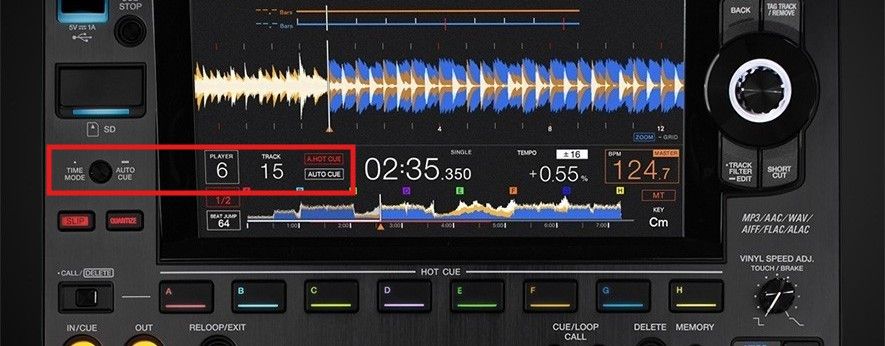
This is one of the settings most likely to catch you out if the previous DJ uses it differently.
With Auto Cue enabled, loading a track makes the player find the start point and wait there, ready to play, rather than starting playback immediately.
If you normally work with Auto Cue, check that it is still enabled before you start.
4. Check Quantize
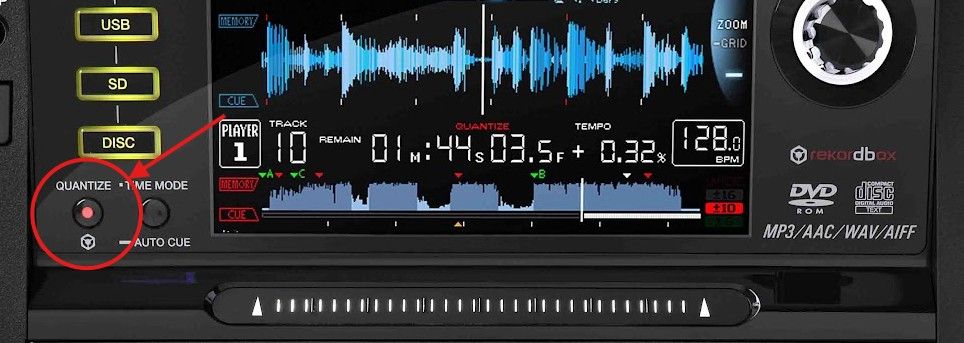
There is no single correct setting here: it depends on how you DJ.
If you use Quantize for loops, Hot Cues or other functions synchronised to the beatgrid, check that it is enabled and set to your usual value.
For example, if you use Quantize at 1 beat, make sure it is still set that way.
This helps actions such as starting a loop land precisely on the corresponding beat division.
If you prefer playing without Quantize, check the opposite: make sure it has not been left enabled.
5. Adjust the jog wheel tension
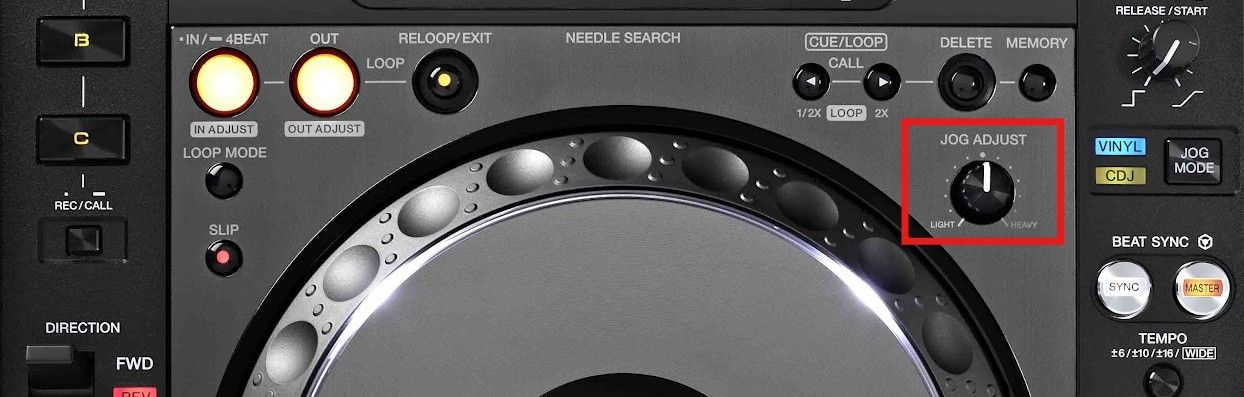
This is not a critical setting, but it can make a big difference to how the decks feel.
If you prefer a heavier jog wheel, turn JOG ADJUST towards HEAVY.
For a lighter response, turn it towards LIGHT.
It is better to adjust it before your set than to discover during the first mix that the jog wheel responds very differently from what you expected.
6. Check the tempo range
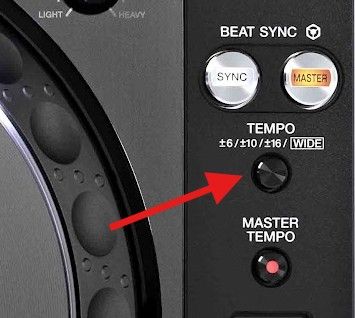
Check which pitch range is selected:
±6 / ±10 / ±16 / WIDE
The choice depends on how you DJ.
For many DJs, ±10% offers a good balance between available range and precision when adjusting BPM.
The important thing is to check before you start. A pitch fader set to WIDE will respond very differently from one set to ±6 or ±10.
7. Check Master Tempo
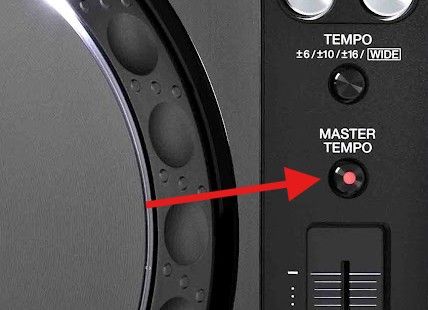
Decide whether you want Master Tempo enabled.
With it switched off, a substantial change in a track's speed also changes its key.
This can be especially noticeable on vocal tracks when matching songs with significantly different BPMs.
If you want to preserve the key while changing the tempo, check that Master Tempo is enabled.
Quick CDJ checklist
- ✓ USB reads correctly
- ✓ Players are connected via LINK
- ✓ Each CDJ has the correct PLAYER No. assigned
- ✓ Auto Cue is set the way you want
- ✓ Quantize is enabled or disabled to suit how you DJ
- ✓ Quantize is set to your usual value
- ✓ Jog wheel tension is to your liking
- ✓ Tempo range is correct
- ✓ Master Tempo is enabled or disabled as required
Mixer checklist
Once you have checked the players, turn your attention to the mixer.
Several settings here can give you a nasty surprise if the previous DJ has left them differently from what you expect.
1. Turn the headphone volume down before putting them on
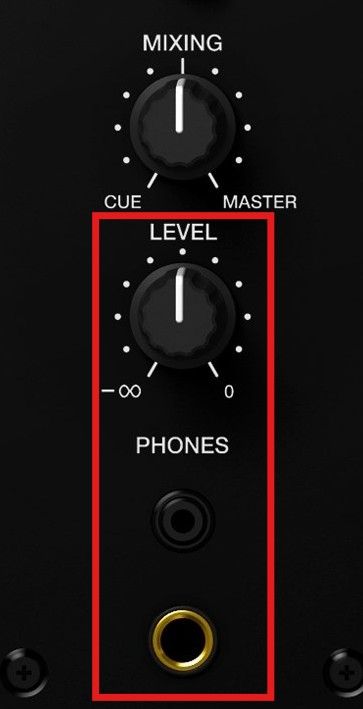
Before connecting or putting on your headphones, check HEADPHONES LEVEL.
Start low and gradually raise it to a comfortable listening level.
Do not assume the previous DJ monitored at the same volume as you.
It takes two seconds and prevents an excessively loud monitoring signal when you press CUE.
2. Check the crossfader assignments
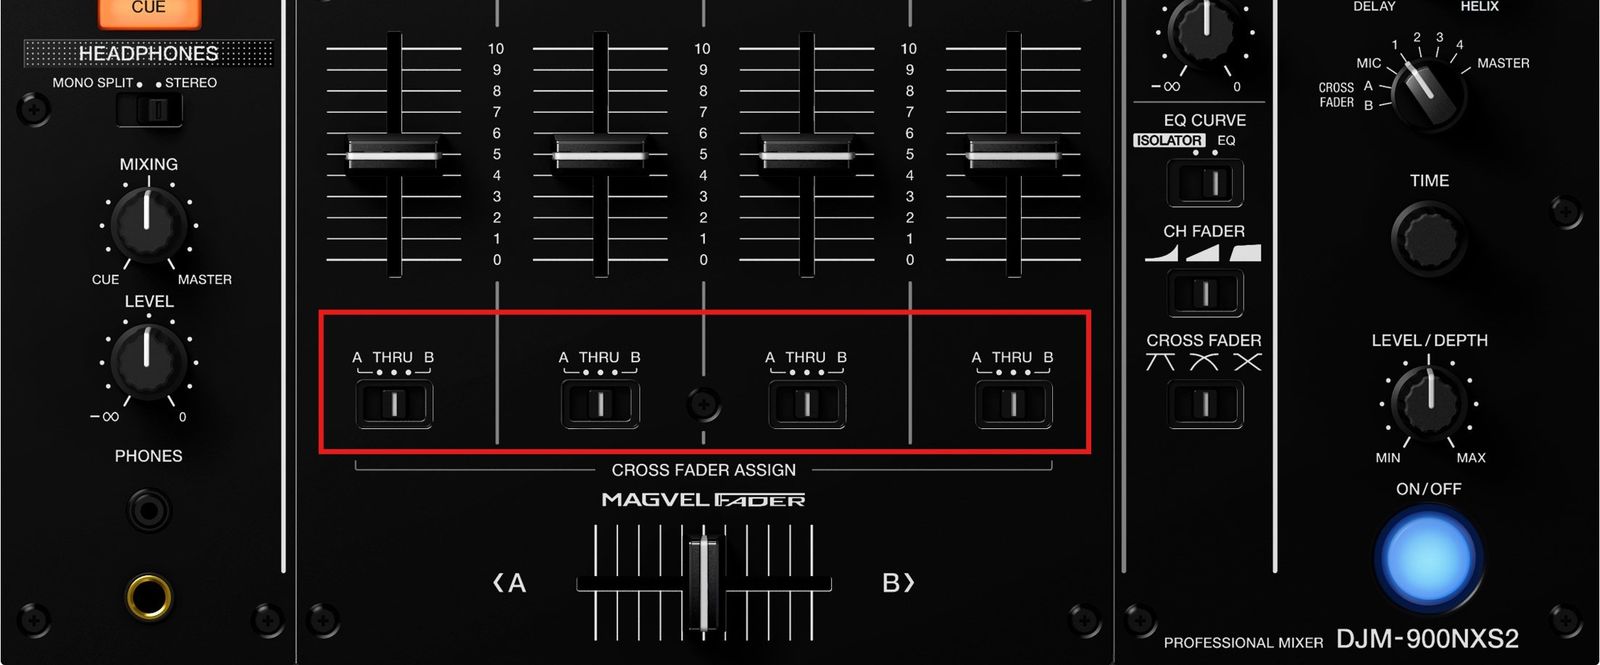
This is one of the settings that can cause the most confusion during a DJ changeover.
On mixers such as Pioneer DJM models, each channel can be assigned to:
A / THRU / B
If the previous DJ used the crossfader, they may have left one or more channels assigned to A or B.
If you do not use the crossfader, set the channels to THRU.
Otherwise, you might raise a channel fader and get no sound simply because the crossfader is at the opposite side.
Check this setting before assuming there is a problem with the channel.
3. Check Stereo / Mono Split for the headphones
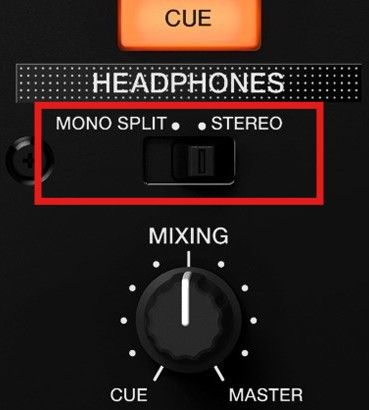
If you use conventional stereo monitoring, check that the headphones are set to STEREO.
If the previous DJ used MONO SPLIT, you might put on your headphones and briefly think something is wrong because you are hearing different signals in each ear.
Again, this is not a fault. It is simply a different setting.
4. Check the TRIM controls before you start
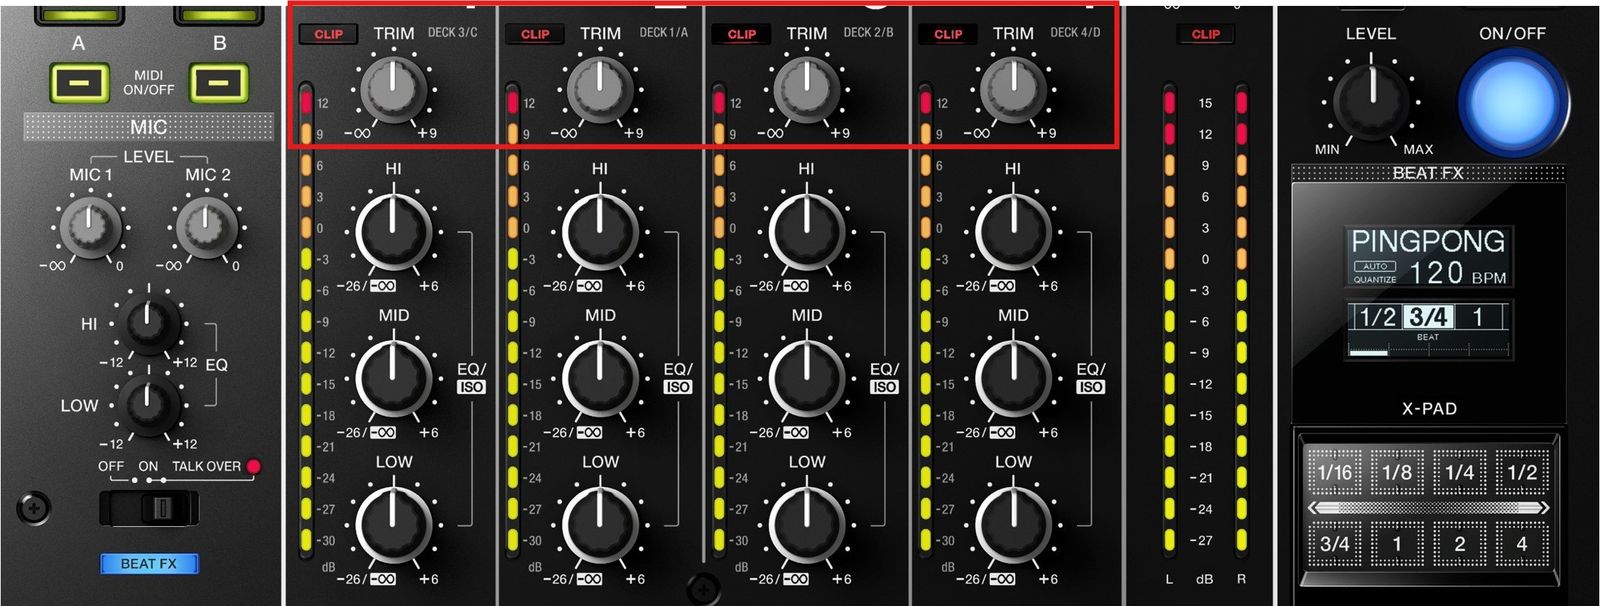
Check the gain on the channels you will be using.
Do not assume the previous DJ left the TRIM controls in a suitable position for your tracks.
Load a track, check the levels and adjust the TRIM to leave enough headroom and avoid clipping.
Do this before you start mixing.
5. Check that no Sound Color FX is active
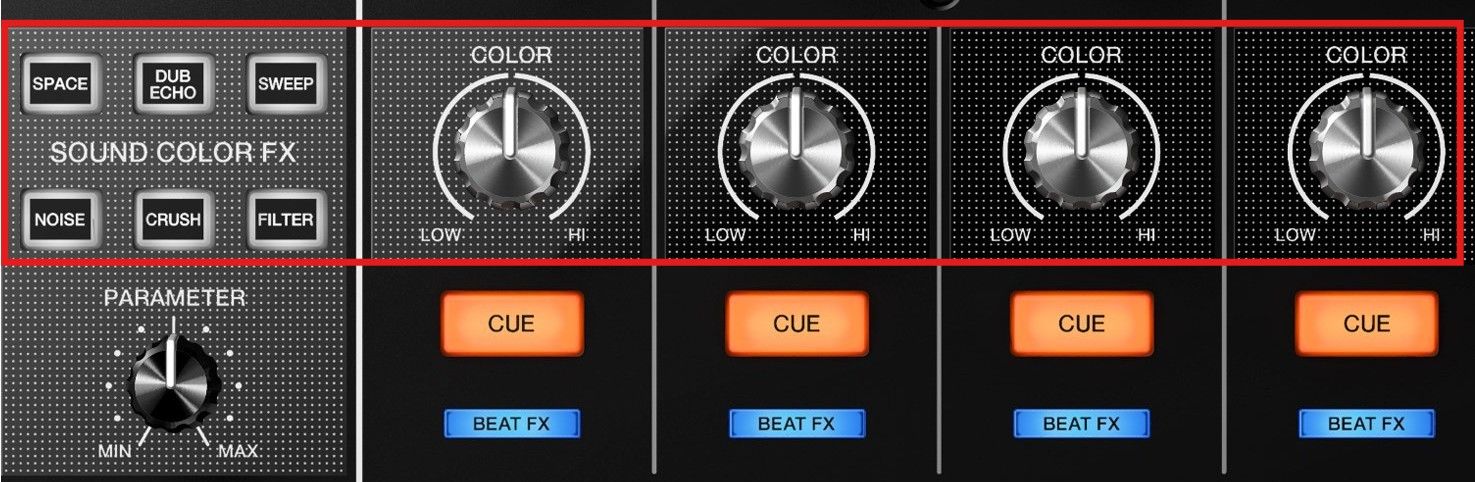
Look at the Sound Color FX section before starting your first track.
Make sure no effect is active unless you intend to use it.
Also check the position of the channel filter/Color FX controls.
An effect left active can alter the sound from the outset, leaving you initially unsure why it sounds different.
6. Check the MASTER balance
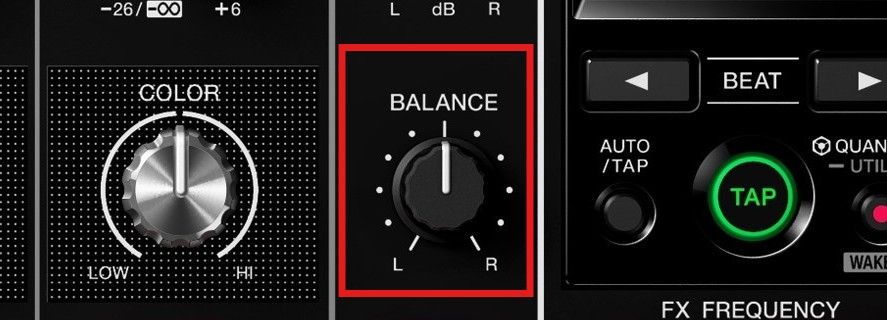
The balance control between L and R should be centred unless there is a specific reason to set it otherwise.
This is another small setting that can cause a lot of confusion if you do not notice the previous DJ has changed it.
7. Check the MASTER level
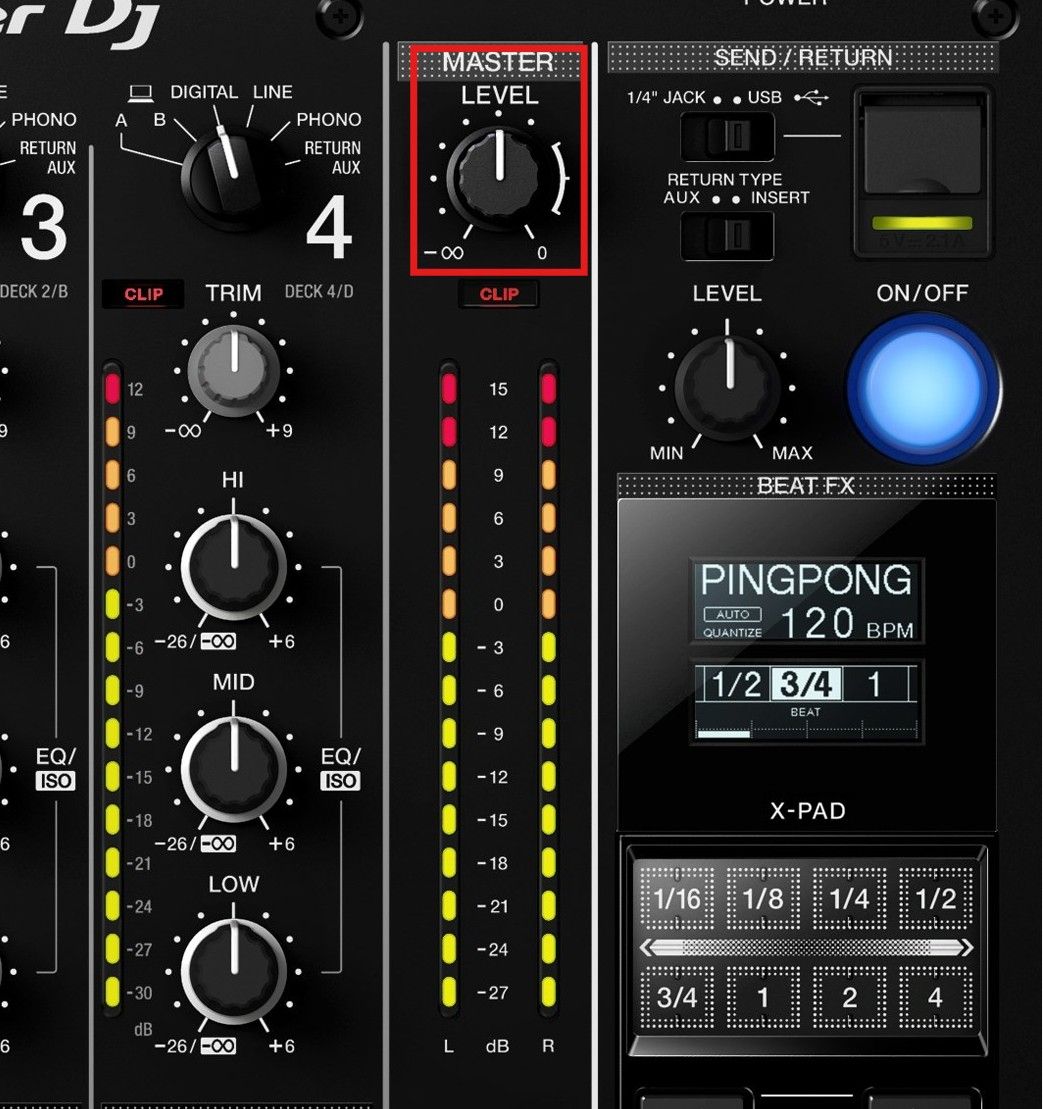
Do not simply start with the MASTER control wherever you find it.
Check the output level and watch the VU meters.
Aim for an appropriate level without constantly pushing the signal into clipping.
More volume in the red does not mean better sound.
8. Check the Beat FX before you start
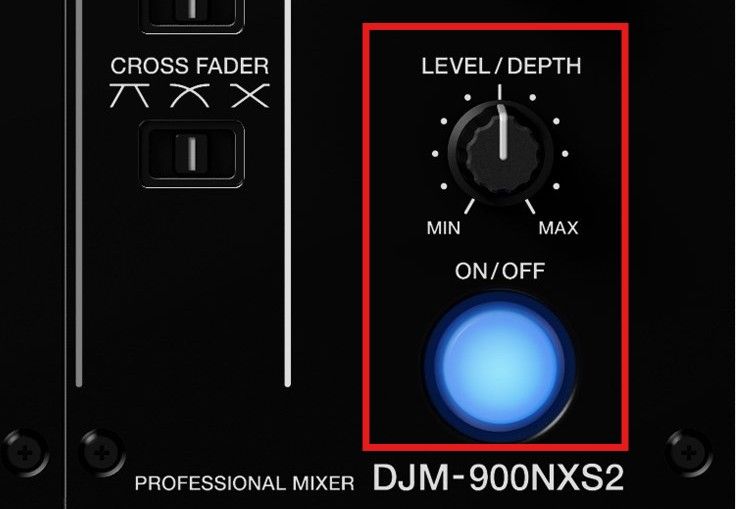
Check the Beat FX section.
Make sure the effect has not been activated accidentally and check the position of LEVEL/DEPTH.
Before starting, the safest approach is to know exactly which effect is selected, which channel it is assigned to and where LEVEL/DEPTH is set.
That way, you avoid switching on an effect and getting a completely different result from the one you expected.
9. Adjust the Booth Monitor
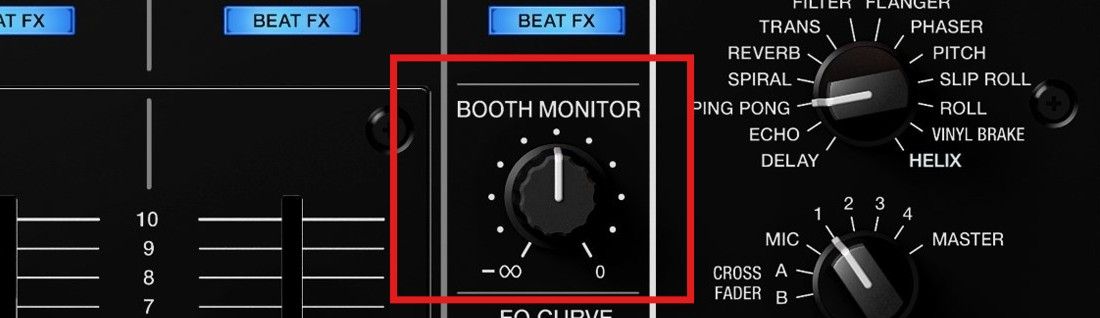
The BOOTH level may also have been left set for the previous DJ's needs.
Start at a reasonable level and adjust it to the monitoring you need in the booth.
You do not need to turn it all the way up to monitor properly.
10. Check EQ / Isolator
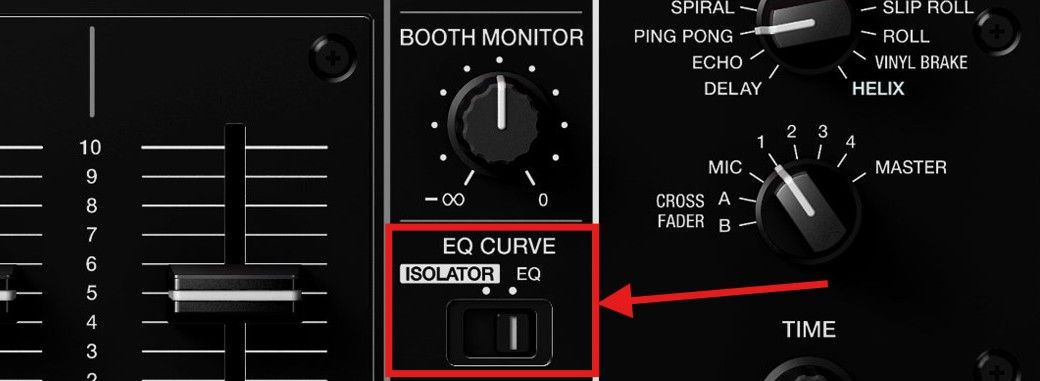
On mixers with a selectable EQ curve, check whether it is set to EQ or ISOLATOR.
The difference matters.
In ISOLATOR mode, turning LOW, MID or HI fully anticlockwise can completely cut that frequency band.
In EQ mode, attenuation works differently and some of that band will remain.
If you normally use the EQs as isolators and the previous DJ has changed this setting, you will notice it as soon as you start mixing.
Better to check beforehand.
Quick mixer checklist
- ✓ HEADPHONES LEVEL low before starting
- ✓ Crossfader Assign set to THRU if you do not use the crossfader
- ✓ Headphones set to STEREO or MONO SPLIT to suit how you DJ
- ✓ TRIM controls correctly adjusted
- ✓ No Sound Color FX accidentally active
- ✓ Channel EQ/Color FX controls in the expected positions
- ✓ MASTER BALANCE centred
- ✓ MASTER at an appropriate level, without clipping
- ✓ Beat FX checked and ON/OFF switched off when not in use
- ✓ LEVEL/DEPTH in a known position
- ✓ BOOTH MONITOR correctly adjusted
- ✓ EQ / ISOLATOR set the way you normally use it
The last two minutes before you start
If you have very little time for the DJ changeover, cover at least these basics:
On the CDJs: plug in your USB, check LINK, load a track and check Auto Cue, Quantize, tempo range and Master Tempo.
On the mixer: turn the headphones down first, then check Crossfader Assign, Stereo/Mono Split, TRIM, Color FX, Beat FX, MASTER and BOOTH.
These checks are quick to do and can prevent plenty of problems in the first few minutes of your set.
Above all, do not assume the booth is configured the way you last left it or the way you normally use it.
The previous DJ may be perfectly comfortable playing with a setup completely different from yours.
Spending a few minutes checking the booth before your set means you can start knowing exactly how the players and mixer are configured, then focus on what really matters: DJing.